What is Studio Apartment, Create Studio Apartment Compact Homes
In dense urban areas, studio apartment design has become a popular, practical housing solution. A studio apartment – also called a bachelor or efficiency apartment – is a compact home where the living room, bedroom, and (often) kitchen all share one open space. Studios typically span roughly 300–600 square feet, with a separate bathroom (and sometimes a tiny entryway). This open layout offers big benefits for city dwellers: lower rent, smaller energy bills, and minimal upkeep. In fact, U.S. Census data show studio dwellers spend only about $127/month on utilities – far less than larger units – and new apartments today are even adding space back into studios (studios grew from an average 444 to 457 sq. ft. in 2024).
As real estate costs rise and more people favor simplicity, studio living appeals to a new generation of renters (students, young professionals, and minimalists) who want to “go small but go smart.” High-density cities around the world are responding with creative micro-apartments. For example, major cities like New York, London, and Tokyo are seeing micro-apartment buildings aimed at singles and couples. WeWork’s WeLive condos in NYC even offer 450 sq. ft. apartments at a fraction of traditional rents. (Over 60,000 people have applied for Carmel Place, NYC’s famous 260–370 sq. ft. micro-unit building.)
But with a small footprint come big design challenges. Without walls, it’s easy for a studio to feel cramped or cluttered. The key is thoughtful design. In the sections below, we’ll cover everything – from space-saving layouts and multifunctional furniture to clever storage and décor – to help you make your studio both stylish and livable.
Table of Contents
Core Design Principles for Studio Apartment Success
Effective studio design isn’t just about looks; it’s about using space smarter. Follow these core principles to make your tiny apartment feel open and intentional:
- Open Concept Planning: Avoid blocking the flow. Keep permanent walls and bulky partitions to a minimum. Instead, use furniture or shelving as flexible dividers. This maintains a visual connection between areas.
- Clear Circulation: Plan a smooth path through your studio. Don’t block the entryway-to-kitchen or bedroom passage with obstacles. A clear walkway (for example, from door to bathroom) makes the space feel bigger and more comfortable.
- Sense of Spaciousness: Light and color are your friends. Paint walls in pale neutrals, off-whites, or soft pastels – light colors “recede” and brighten the space. Mirrored surfaces and generous lighting also amplify the sense of airiness. (As Benjamin Moore notes, “lighter paint colors like off-whites, light neutrals, and pastels” create the illusion of a larger, brighter room.) Use multiple light sources instead of one overhead lamp, combining ambient ceiling lights with task lamps and accent fixtures. This layered lighting prevents flat, shadowy corners.
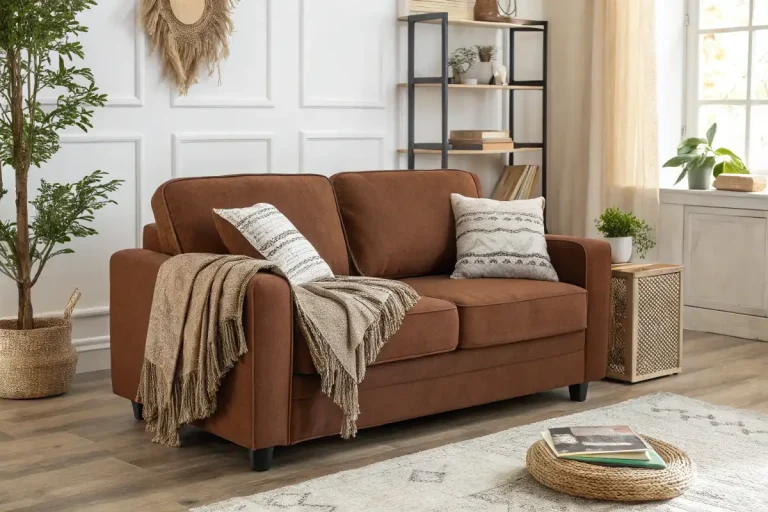
- Right Scale and Proportions: Size matters. Choose furniture that fits – not overwhelms – the room. A gigantic sofa or dining table will make a studio feel claustrophobic. Look for low-profile pieces and open-legged furniture that leave visual breathing room. A compact sofa and petite dining set (or a wall-mounted drop-leaf table) keep things in scale.
- Functionality First: Every item should earn its spot. In a studio, there’s no bonus square footage for purely decorative clutter. Prioritize furnishings with storage or multiple uses (apartment furnishing guide). For example, a coffee table with drawers, or a bed that lifts up for storage. Each piece should contribute to living better in less space.
By keeping things open, light, and purposeful, you lay the foundation for a studio that feels larger and more livable from day one.
Space Zoning and Layout Strategies: Defining Areas in One Room
When you have one room to live in, clever zoning is essential. Even without walls, you can create “rooms within a room” by using visual cues and smart layouts:
- Furniture as Divider: Position furniture strategically to carve out areas. For instance, place the back of a sofa facing the bed to delineate a living zone. Or angle a couch so it faces the kitchen. A narrow bookshelf or a console table behind a sofa can double as a partition and storage. Floating furniture away from walls also creates depth – it suggests walkways and separate zones without closing off space. (space-saving sofas)
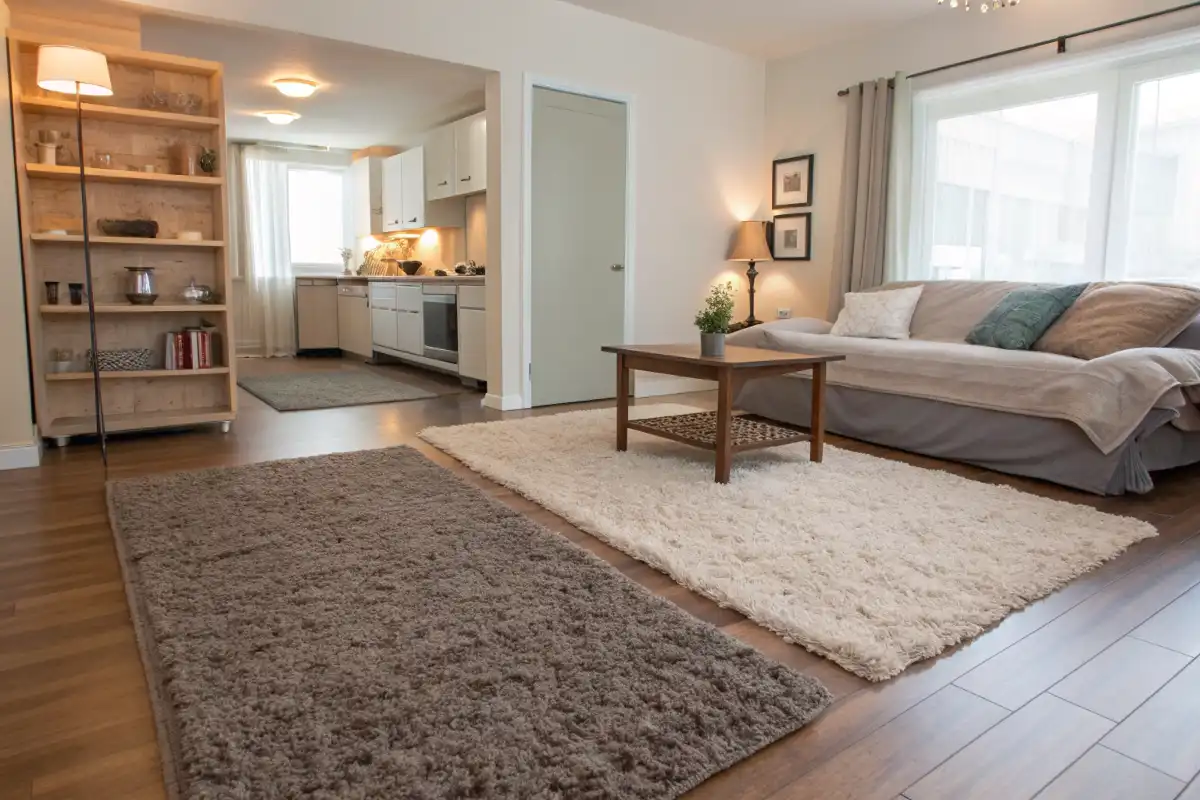
- Area Rugs: Rugs are zone flags for the brain. Lay down a large rug under the sitting area and a different rug under the bed or dining table. These distinct carpets “anchor” each function: perhaps a textured rug under the sofa, and a softer rug under the bed. Even if the rugs coordinate in color, the change in texture or pattern signals a different use for the space.
- Lighting Layers: Use lighting to outline spaces. Ambient overhead lights give general illumination for the whole studio. Add task lights (like a desk lamp or reading light by the bed) exactly where you work or read. Accent lighting (wall sconces, LED strips) can highlight features or decorate walls. For example, pendant lights over the dining nook versus a floor lamp in the lounge area. Combining these (ambient + task + accent) is a classic designer trick called layered lighting, and it helps the eye understand separate zones.
- Room Dividers: When you need a bit more separation, go partial, not full. Open shelving units (bookshelves with a back, or cages of cubbies) can act as bookcase walls – you see through them enough to keep the airy feel, but they provide storage and privacy. Folding screens or sliding panels (like shoji screens) are renter-friendly ways to section off a nook. If you own the place, even a half-height wall (3–4 ft high) can shield a bed area while letting light flow above.
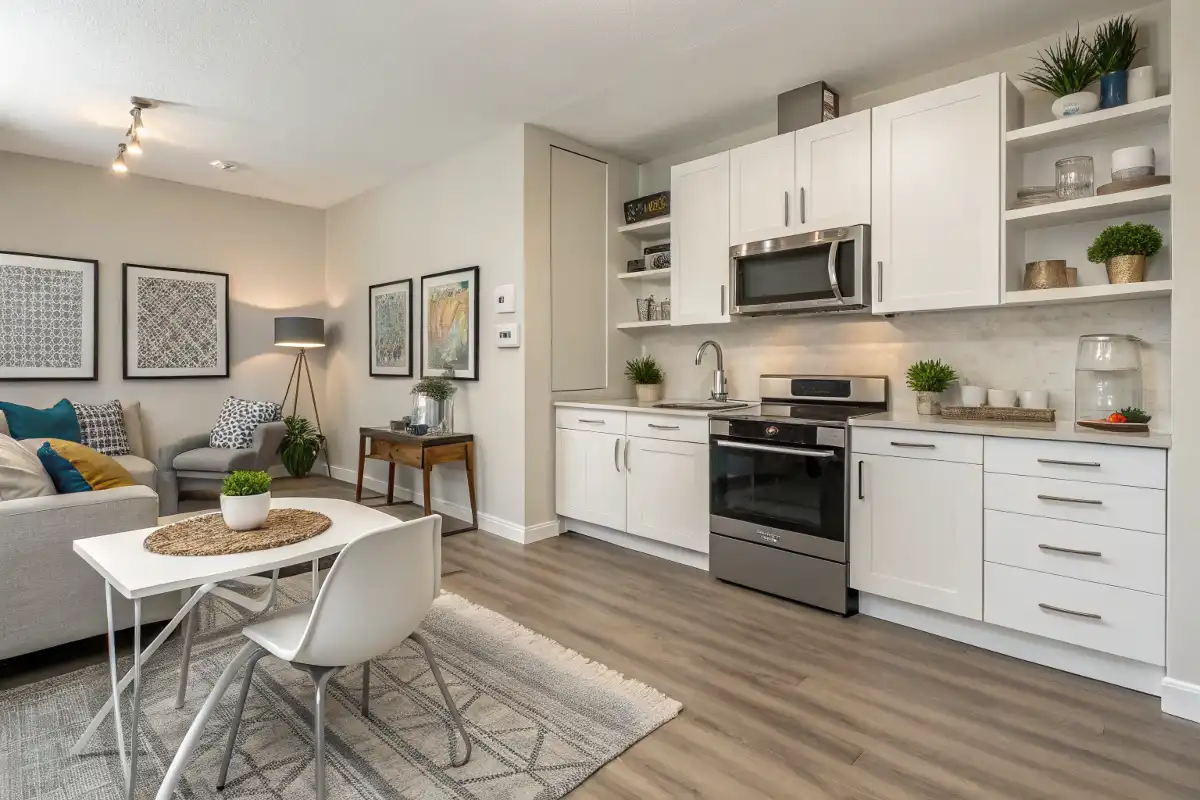
- Floor and Ceiling Cues: Distinct finishes can mark areas. For instance, use tiles or laminate in the kitchenette and wood or carpet in the living/sleeping area. Likewise, different ceiling fixtures (a pendant over the dining spot, recessed lights elsewhere) cue where one “room” ends and another begins.
Popular studio layouts to consider include: an L-shaped plan (kitchen and closet along one wall, living and sleeping along the other), or a central kitchen/island layout (the kitchen as the room’s focal point, with other zones around it). If you have high ceilings, a lofted sleeping platform is another strategy – we’ll see a real example of this in the case studies below.
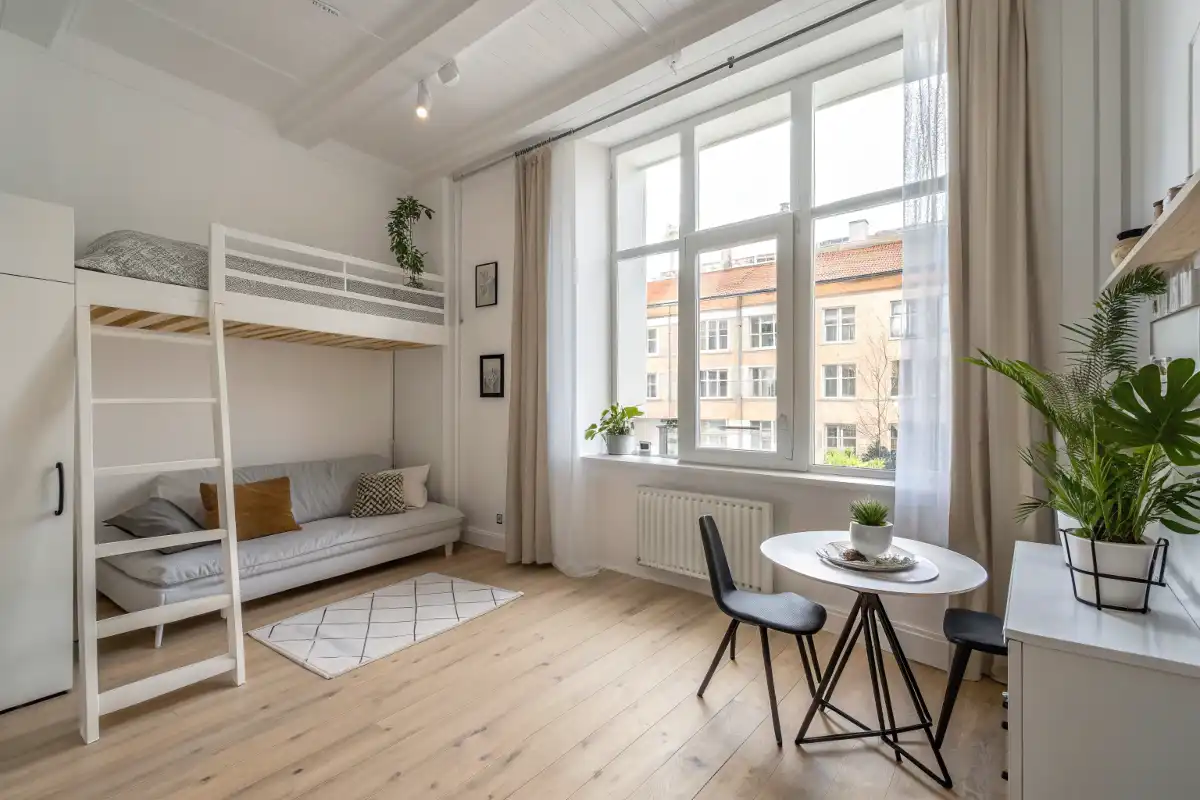
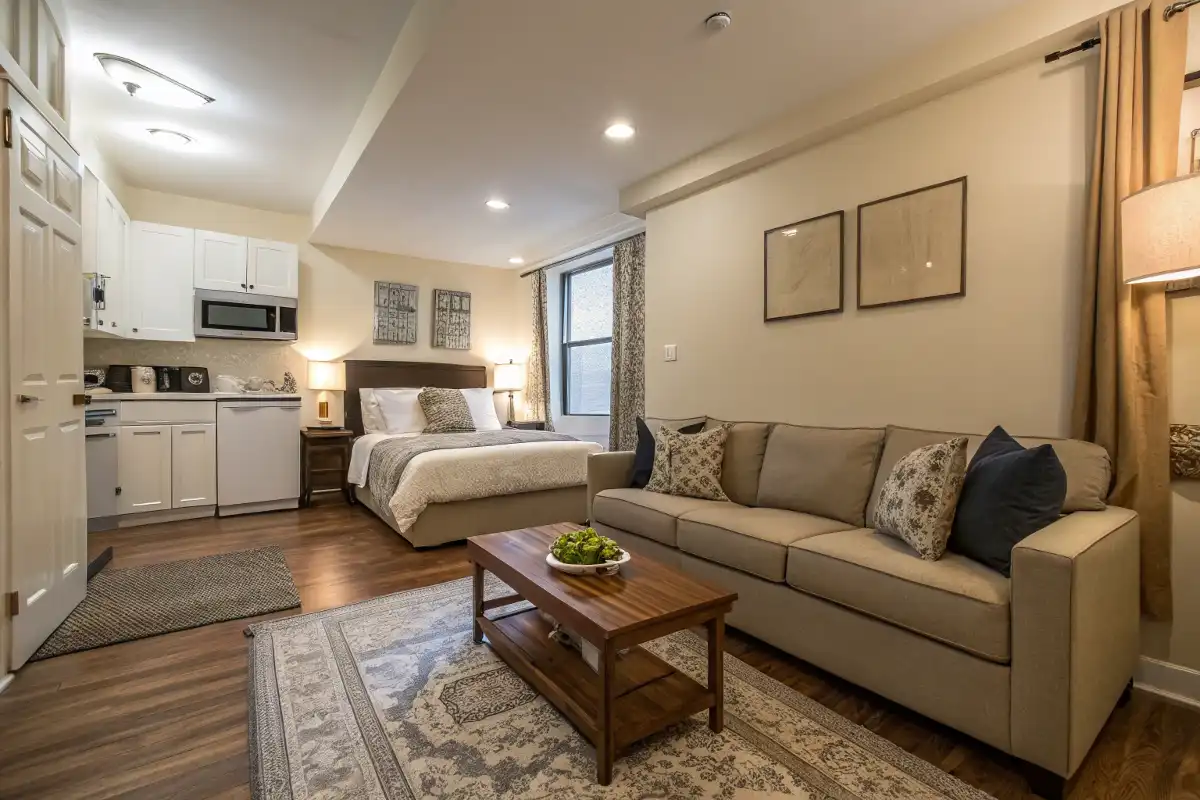
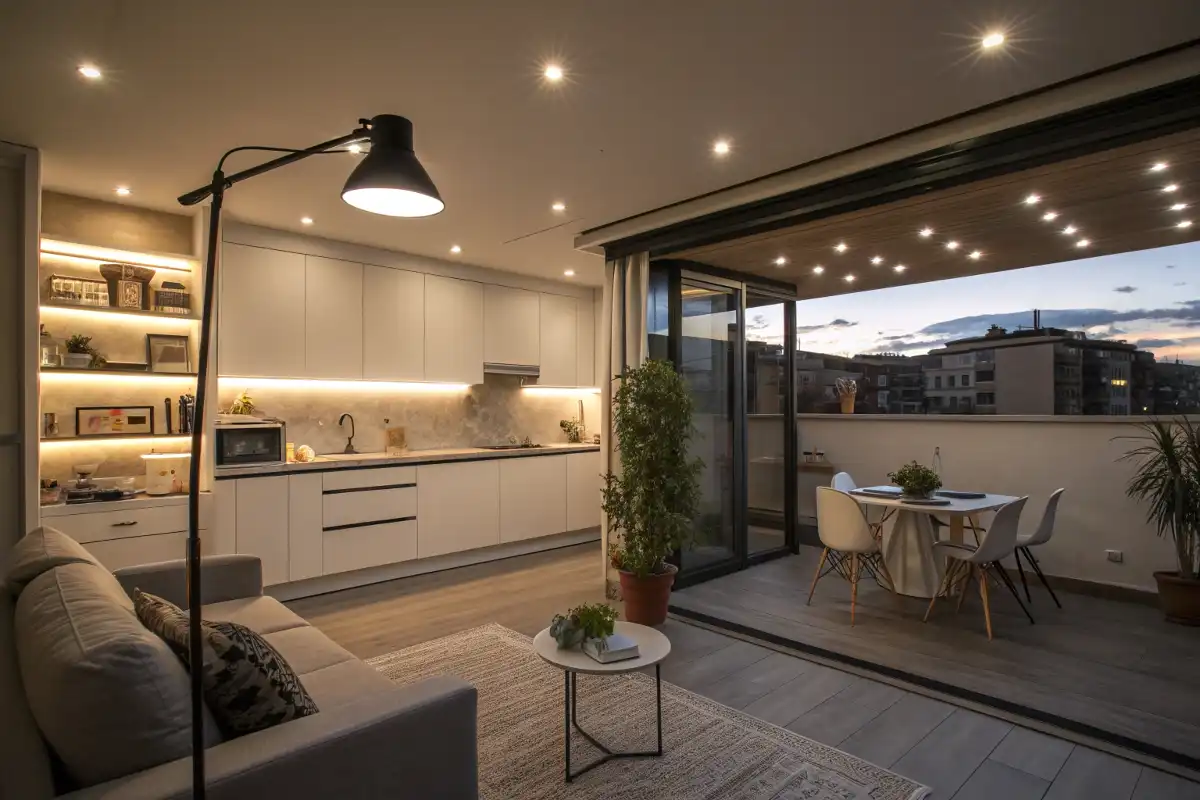
Example: An organized Berlin studio with clever zones and storage. The sofa and bed platform here naturally divide the living and sleeping areas, while built-in steps and cabinets maximize every inch.
In this real design, the open sofa defines the living lounge, and a low partition separates the kitchen alcove. Architectural Digest notes how “establishing zones, which separate the functions of kitchen, bedroom, and living room,” gives order to even the smallest studio (small space living solutions). Clever built-ins further maximize space here – for example, the end of the bed platform doubles as a bench and hidden storage. Notice the layered lighting too: recessed ceiling lights for overall light, plus LED strips under cabinets (not shown) and a floor lamp by the sofa. This mix of daylight and task/ accent lamps makes each zone feel distinct and homey.
By planning your furniture, rugs, and lights with intent, you mentally outline “zones” in your studio – so each area has its own identity, even though it’s all one room.
Multifunctional Furniture Solutions: Doing More with Less
In a studio, your furniture must pull double (or triple) duty. Opt for pieces that maximize function:
- Sofa Bed or Daybed: Acts as both couch and guest bed. A good-quality sofa bed provides comfortable seating by day and a full-size sleeping surface by night. Choose one with built-in storage beneath if possible, to stash bedding.
- Storage Ottoman / Coffee Table: A cube ottoman or coffee table with a lift-top or drawers can be a seat, a footrest, and a hidden storage bin all in one. It tucks clutter out of sight (books, blankets, remote controls) and can even serve as extra seating for guests.
- Nesting Tables: Instead of one big dining table, use a set of nesting tables or side tables. They pull out and combine when you entertain friends, then tuck neatly together against a wall or under the couch when not in use, saving precious floor space.
- Murphy Bed / Wall Bed: These wall-mounted beds flip or slide away to free the floor. When closed, the wall becomes functional – some Murphy beds include shelves or desks on the front. It’s the ultimate space-saver: your bedroom disappears at the push of a button. (Brands like Resource Furniture specialize in these room-saving transforms.)
- Expandable or Drop-Leaf Table: A dining table that expands only when needed can keep the area open. For example, a wall-mounted table with drop leaves pulls down for meals and flips up flush against the wall otherwise.
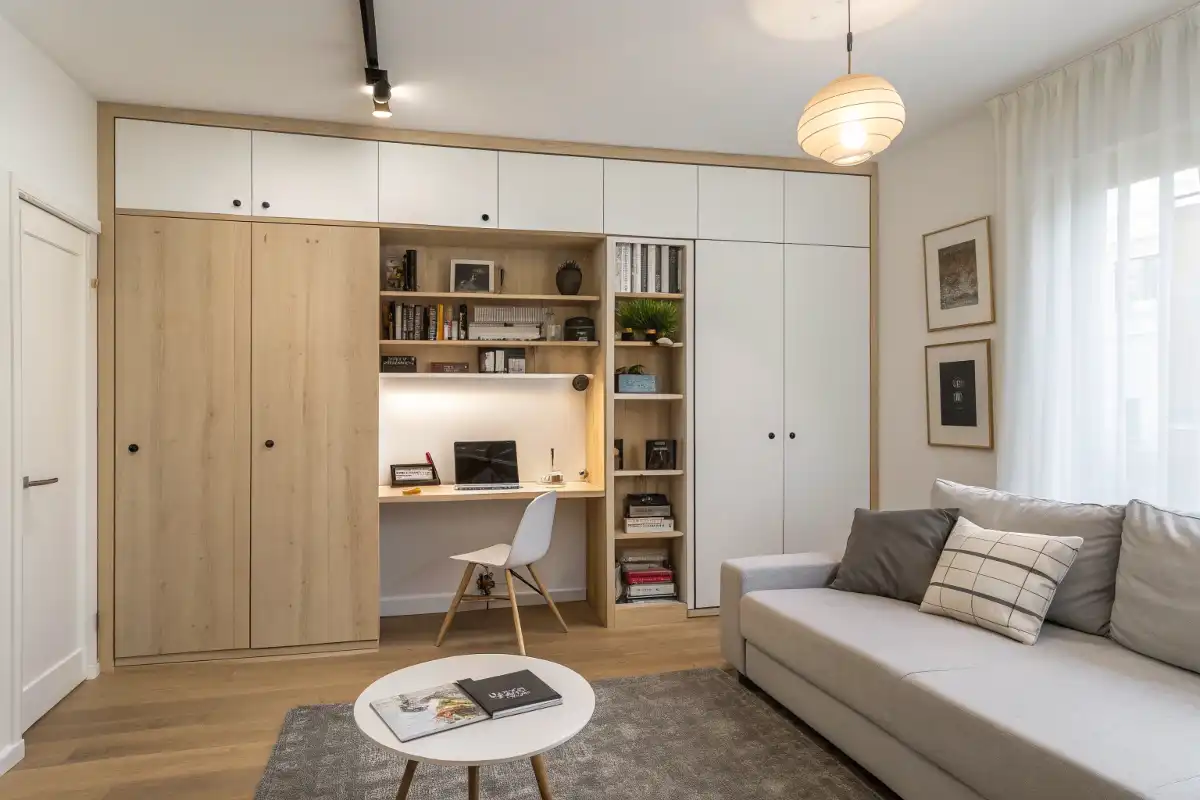
- Folding or Wall-Mounted Desk: For a work-from-home setup, consider a desk that folds up when you knock off work. Some modern units tuck into a wall cabinet or closet, hiding away your home office at quitting time.
Each of these pieces earns its spot by doing at least two jobs. A well-chosen multifunctional couch and a clever table can open up your studio dramatically, compared to single-purpose furniture. In the words of minimalist designers, “every item should justify itself” – if it’s purely decorative, it’s often best left out of a small apartment.
Clever Storage Ideas: Declutter and Organize Like a Pro
Clutter is the enemy of a small space. The goal is to hide the mess and use every available inch. Aim to store 100% of your stuff and keep surfaces clear. Here are top strategies:
- Vertical Storage: Think upward, not outward. Install floor-to-ceiling shelves or cabinetry in unused corners. Use the space above doors or windows for high shelves. In the kitchen, mount pot racks or hanging baskets under cabinets. In living areas, wall-mounted bookcases or high shelves draw the eye up (and IKEA notes that vertical shelving “open[s] the space dramatically,” making rooms feel bigger).
- Under-Bed Storage: The space beneath your bed is prime real estate. Use rolling bins or vacuum bags for out-of-season clothing and linens. If possible, invest in a bed frame with built-in drawers. Even a plain bed riser can create a foot or two of hidden storage underneath. (For renters, consider a raised platform bed with IKEA boxes tucked underneath.)
- Wall-Mounted and High-Up Solutions: Free up floor area by going on the wall. Floating shelves keep the floor clear while storing books, plants, or accessories. In the kitchen, magnetic knife racks and hanging spice racks make use of wall space. In the entryway, high hooks on the wall or over-door shoe organizers keep coats, bags, and shoes up off the floor.
- Built-In and Custom Storage (Renovators): If you own or can renovate, integrate storage into the architecture. For example, build a window bench with a lift-up lid or drawers underneath. A staircase to a loft bed can hide drawers in its risers. Sliding closets with mirrored doors save swing space. A niche or alcove can be fitted with shelves or a closet rod. The less “dead” space you have, the better – look for every little nook to convert into a cubby.
- Hidden-Storage Furniture: Choose tables or seating with secret compartments. For example, a hollow coffee table, a bed frame with a flip-top board at the foot, or storage cubes under a dining bench. Even ottomans and stools can be trunks. These let you stash extra blankets, paperwork, or kids’ toys out of sight.
- Lean, Mean System: A good rule is: “If it’s not stored, it’s clutter.” Invest in organizers (baskets, boxes, dividers) so that even small items have a proper place. Label bins inside cabinets, use drawer dividers, and keep surfaces minimalist. Every item should have a “home” – when everything is stored away, the apartment instantly looks calm and spacious.
By maximizing vertical space and hiding your belongings, you keep visual clutter at bay. As IKEA puts it, even a tiny studio can have “ease, organization and enjoyment” with the right “space activating storage solutions”.
Design Elements for Small Spaces: Color, Light, and Materials
The right finishes and materials can make or break a studio’s feel. Here are design tips to amplify your space:
- Light Color Palettes: Stick mostly to light, neutral wall colors. Whites, soft grays, pale beiges, or gentle pastels reflect daylight and make ceilings appear higher. As Benjamin Moore’s experts note, “lighter paint colors like off-whites, light neutrals, and pastels” give the illusion of a larger, brighter room. (You can still have one accent wall in a bolder color if you like; a strategically placed dark or vibrant wall can add depth and a focal point without shrinking the space.)
- Mirrors and Reflective Surfaces: Mirrors are magic in a studio. A full-length mirror or mirrored closet doors not only open up the view but double natural light by reflection. Consider a mirrored backsplash in the kitchenette or glass-fronted upper cabinets. Glossy or metallic surfaces (a glass coffee table, shiny backsplash, or polished chrome fixtures) also help bounce light around.
- Layered Lighting: Avoid a single overhead bulb. Instead use layers of light: ambient (ceiling) lights for general illumination, task lights for work areas (a desk lamp or kitchen under-cabinet strips), and accent lights for coziness or drama (wall sconces, LED strips behind shelves). This “layered lighting” technique – mixing ambient, task, and accent – creates depth and makes the space feel intentional.
- Limited Materials Palette: Keep finishes consistent and cohesive. Choose two or three main materials and repeat them throughout. For example: natural wood (floor or furniture), a neutral stone or concrete (countertops or wall), and metal (light fixtures or hardware). Too many conflicting materials can visually clutter a small space.
- Texture Over Color: Since you’re using a restrained color scheme, play with texture to add warmth. A chunky wool rug on wooden floors, linen throw pillows, a woven rattan chair, or a soft sheepskin draped over a sofa can all add coziness without overwhelming the eye.
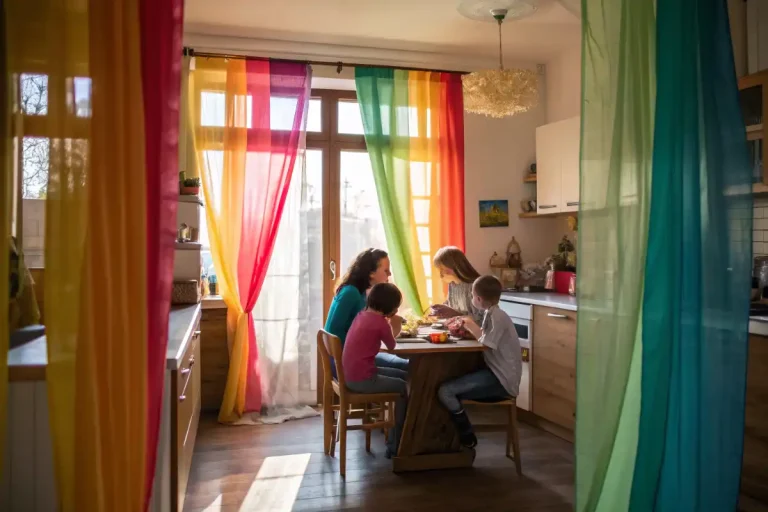
- Window Treatments: Maximize natural light. Opt for sheer curtains or roll-up shades that let light filter in while giving privacy. Heavy drapes tend to look bulky; if you use curtains, mount the rod high and wide so the fabric stacks outside the window frame when open.
With light hues, plenty of smart lighting, and a consistent material story, even a 300-sq-ft studio can feel airy. Remember: your goal is to make walls recede and illuminate every corner.
Styling and Personalization: Make It Feel Like Home
A studio can be small without feeling sterile. Thoughtful décor and personal touches bring warmth and personality without crowding the space:
- Statement Art or Focal Piece: Pick one or two larger artworks rather than many tiny knickknacks. A big painting or framed poster above the sofa/bed can act as a focal point. If you love gallery walls, keep the frames uniform in color or style to avoid visual clutter.
- Houseplants and Greenery: Even one or two plants can liven up a studio. Plants like snake plants, pothos, or ZZ plants require little care and add fresh color. Hanging planters or wall-mounted pots free up floor space. Besides looking nice, indoor plants can improve air quality and mood.
- Textiles: Layering textiles makes a small place cozy. A patterned rug (even a small one) under the couch, colorful throw pillows on a sofa, and a textured blanket at the foot of the bed add softness. Use fabrics to tie zones together – for instance, throw pillows in the living area that echo colors in the bed linens.
- Curated Accessories: Choose a few meaningful items that reflect you – a vintage lamp, a ceramic vase, a collection of books with decorative covers. Group related objects (e.g. a set of candles or pottery) instead of scattering unrelated items. One good trick: limit to one decorative “wow” piece per zone. This way the space feels personalized but not messy.
- Declutter Ritual: Regularly edit what you own. In a studio, less truly is more. If you aren’t actively using something, find a storage spot for it (see earlier section) or consider letting it go.
Keep the décor light and streamlined. Ultimately, quality over quantity is the motto: a few well-chosen accents will make your studio welcoming.
Design Inspirations: Studio Styles That Work
Here are some style “flavors” that naturally suit small spaces. Pick one that feels right and adapt its principles to your studio:
- Minimalist Studio: Think simple and serene. Stick to a very limited color palette (white, black, gray) with natural wood or a single accent hue. Use built-in or hidden storage so that nothing is out of place. Clean lines and unadorned surfaces dominate. This style declutters the eye – even if the square footage is small, the space feels calm and expansive because there’s no visual noise.
- Industrial Loft: If your studio has high ceilings or raw features, lean into the urban vibe. Key elements include exposed brick or concrete walls (or wallpaper that mimics them), metal light fixtures, and open shelving. Use dark metal accents and reclaimed wood. Don’t shy away from open pipes or beams if you have them. To keep it from feeling cold, mix in some cozy textiles (a soft rug or fabric sofa) and warm wood tones. The balance of raw and warm is essential.
- Cozy Scandinavian: This popular style is made for small spaces. The palette is light (lots of whites and pale grays) with touches of natural wood. Furniture is functional with simple forms. Layer in color with soft throws in muted tones and bring in plants for life. The goal is a bright, inviting feel: plenty of daylight, hygge-style textiles (sheepskin, wool), and décor that highlights clean functionality. Candles and small accent pillows add warmth.
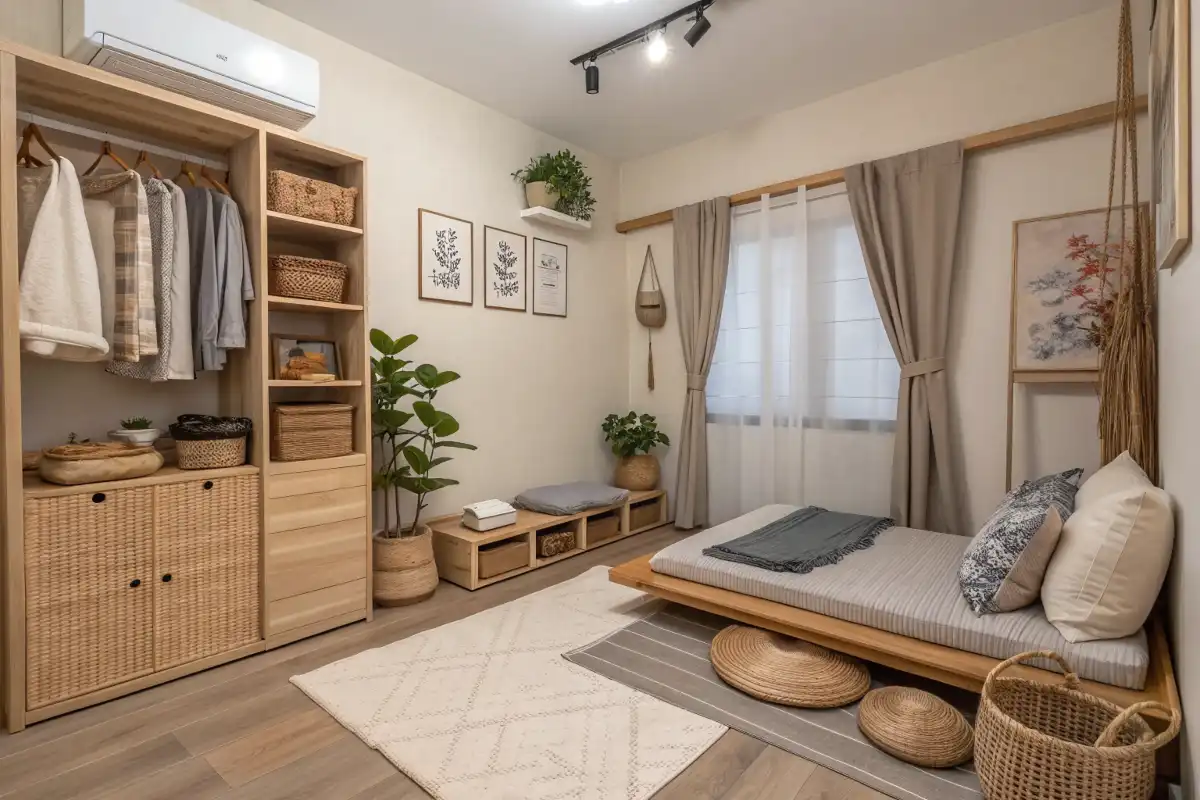
- Japandi (Japanese + Scandinavian): A blend of the above two: minimal yet warm. Use a neutral earthy palette (think muted clay reds, warm beiges, soft greys). Natural materials are key – raw wood furniture, linen or cotton fabrics, bamboo or rattan accents. Keep furnishings low to the ground (like a Japanese futon-style bed, or a low dining table on tatami). Every piece should have both purpose and beauty. The result is a serene, zen-like studio that feels uncluttered yet nurturing. Designers note that Japandi emphasizes “functional beauty” and sustainability, so choose quality pieces that last.
Experiment with one of these approaches to see what resonates. For example, a Scandi-Japandi fusion might use simple wooden furniture, a few matte black metal accents, and lots of cozy textiles – all while keeping the color scheme calm and the layout airy. The style you choose will guide your furnishing and color choices, making design decisions easier.
Renter-Friendly Solutions: No Renovations Needed
If you’re renting and can’t paint walls or add permanent walls, don’t worry. There are plenty of temporary tricks to dress up a studio:
- Removable Wallpaper or Decals: Instantly add a patterned accent wall with peel-and-stick wallpaper. It’s easy to apply and remove, and can dramatically change the mood.
- Command Hooks & Strips: Use these heavy-duty removable hooks to hang artwork, shelves, or even lightweight curtains – no drilling required. Today’s products hold surprising weight.
- Freestanding Dividers: A rolling bookcase, folding screen, or tall plant stand can act as a room divider with no installation. You can reposition it any time.
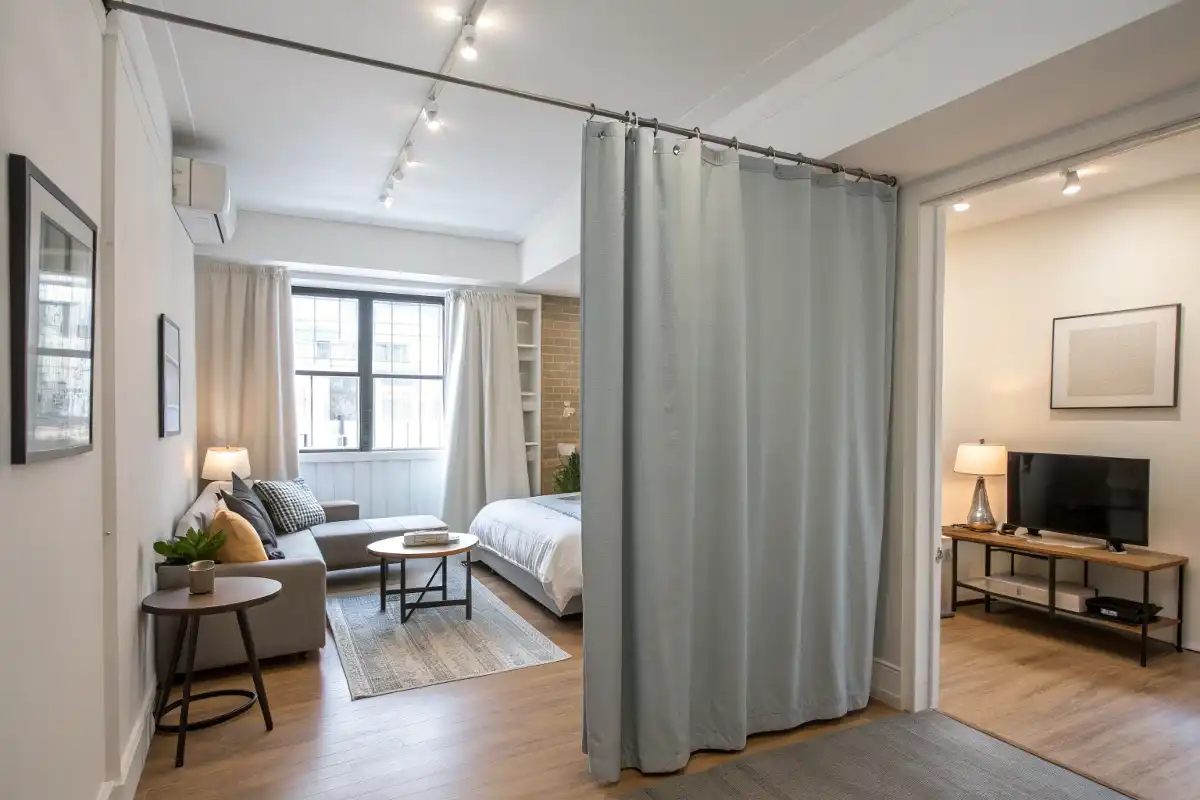
- Curtain Dividers: Suspended from a tension rod or wire, a curtain can create an instant “wall” between the bed and living area. When open, it tucks away; when you want privacy, you simply pull it closed.
- Peel-and-Stick Tiles: In the kitchen or bathroom, peel-and-stick backsplash tiles are a renter-friendly update. They handle splashes, add style, and peel off later.
- Rugs and Lighting: Even without touching the walls, you can define zones with area rugs (as we discussed) and change the ambiance with lamps. Placing a tall floor lamp next to your couch or bed can make it feel like a different “corner” of the home.
The key is to make any changes temporary and reversible. Landlords usually accept temporary decor – just be sure to keep all the original pieces (like paint touch-ups, etc.) for move-out. With these tricks, you can personalize your studio without permanent construction.
Case Studies: Real Studio Transformations
Seeing principles in action can spark ideas. Here are two quick examples of smart studio makeovers:
- Case Study 1 – The 400-SqFt NYC Studio: This cramped Manhattan studio was completely re-imagined by the designer. They replaced a heavy sectional and sofa bed, added a wall bed with built-in storage, and installed a sliding barn door for the bathroom. Modern barn doors are perfect for studios – they “glide along the wall… freeing up several feet of usable space,” and can “reclaim up to 14 square feet” compared to swinging doors. In this apartment, the barn door not only hides the bathroom but also acts as a room divider when needed. LED strip lights were installed under cabinets and shelves to brighten the space without bulky lamps. The result: the same 400 sq. ft. now feels open, with a clear sleeping alcove, a living area with a storage sofa, and a kitchenette – each zone logically separated yet visually connected.
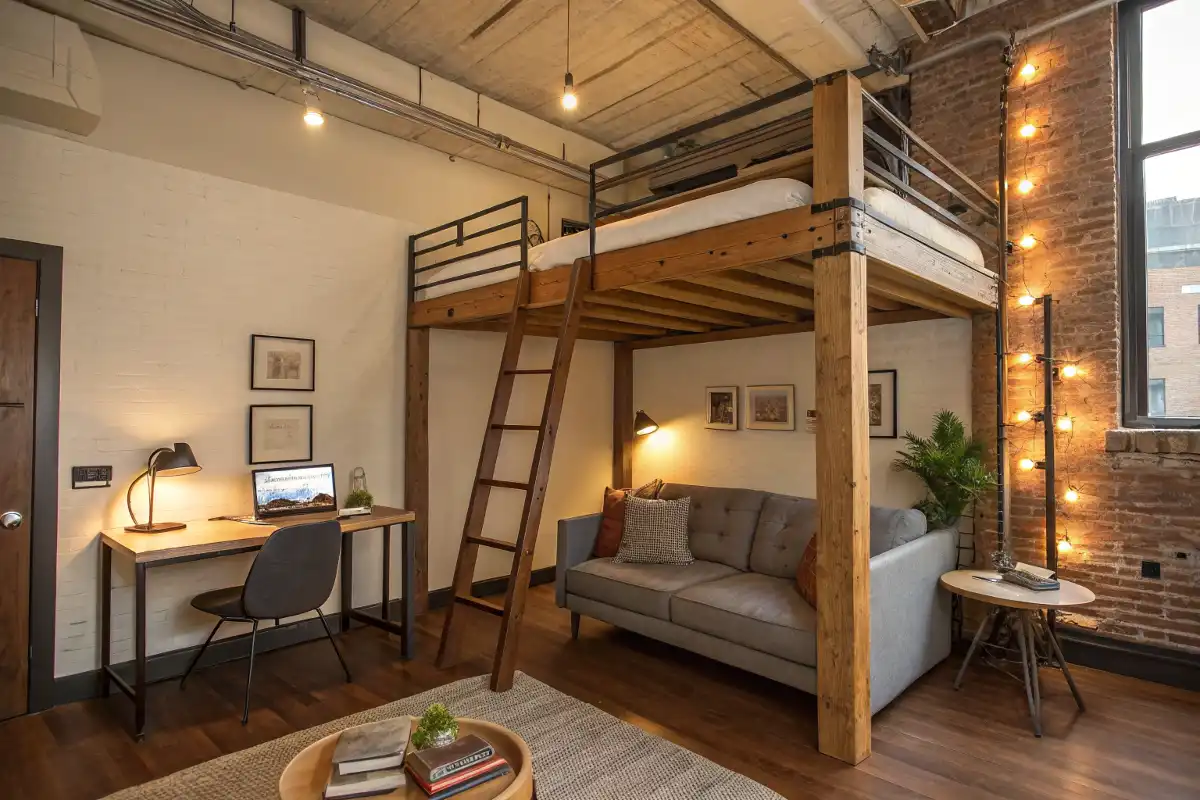
- Case Study 2 – Berlin Loft-Style Micro Apartment: Here’s a clever use of vertical space. The designer built a loft bed above the living area, taking advantage of the studio’s high ceilings. As Dwell magazine describes a similar project, “the bedroom takes advantage of the high ceilings in a loft and creates livable space above the common area”. In practice, this means the compact sofa and desk stayed on the lower level, while the custom oak bed was integrated into a suspended box above. The lofted bedroom “floats” above the living room without columns, and even has adjustable wall panels for light. This freed up the floor entirely for day-to-day activities. (The floating loft concept maintained an airy feel – daylight filters through, and the living room underneath still has 9-foot ceilings.)
These examples show how the ideas above come together: multifunctional furniture, creative dividers, and even the structure of the apartment itself can be leveraged. With a bit of ingenuity, a tiny studio can be transformed into a fully functional, stylish home.
Conclusion and Final Tips: Your Studio, Your Sanctuary
Living in a studio doesn’t mean living without comfort or style. In fact, your small space can become a cozy, creative haven with these strategies. Remember:
- Start with a Plan: Sketch out your layout first. Decide where each zone (sleep, eat, work, relax) will go before you buy furniture.
- Invest in Versatility: Choose multifunctional pieces (sofa beds, ottomans with storage, foldable tables). Quality items that serve multiple purposes pay off in space (and they often pay off long-term too).
- Keep It Light and Bright: Use light wall colors, plenty of windows or mirrors, and layered lighting to lift up the room. A well-lit studio almost feels bigger.
- Define Your Zones: Even in one room, make each area distinct with rugs, furniture placement, or lighting. This avoids the “cluttered all-in-one” vibe.
- Stay Organized: Be ruthless with storage. If you bring something new in, consider what (if anything) should go out. Use vertical and hidden storage to keep belongings tucked away.
- Personalize Thoughtfully: Let a few decor pieces reflect your personality, but be selective. A handful of favorite items can give warmth without crowding the space.
- Be Adaptable: Your needs will change. Maybe today you have a home office corner, and next year you need room for a workout mat. Choose flexible solutions (like a fold-up desk or mobile storage) so your studio can evolve with you.
A studio is not a compromise – it’s an invitation to design intelligently. Every square foot becomes precious, so every choice matters. With creativity and intentional design, you can turn a small area into a sanctuary that feels much larger than its footprint.
Whether you’re a first-time renter or a busy city professional, studio apartment design can be as fun as it is functional. Take it one step at a time: try rearranging a piece of furniture or clearing out a closet. These small changes can lead to big transformations. Before you know it, your tiny apartment will be a chic, organized home that feels just right.
Frequently Asked Questions (FAQ) About Studio Apartment Design
- What is a studio apartment vs. a one-bedroom apartment?
A studio apartment is a single open-concept room that combines your bedroom, living area, and kitchen into one space—typically with a separate bathroom. A one-bedroom apartment has a separate bedroom, offering more privacy and separation. Studios are usually smaller and more affordable, making them ideal for minimalists or city dwellers.
- How do you make a small studio apartment look bigger?
To make a studio apartment feel larger, use light colors, mirrors, and smart lighting. Choose low-profile or multi-purpose furniture, avoid clutter, and keep the floor plan open. Vertical storage, floating shelves, and zone-defining rugs can also create visual space without adding bulk.
- How do I separate my bed from my living area in a studio apartment?
Use space zoning techniques such as:
- Bookshelves or open storage units as room dividers
- Curtains or sliding panels
- Rugs to define separate zones
- Loft beds or Murphy beds for more floor space
- Lighting changes to suggest different areas (e.g., pendant over the dining area)
- What kind of furniture works best in studio apartments?
Look for multifunctional furniture like:
- Sofa beds or daybeds
- Nesting or drop-leaf tables
- Ottomans with storage
- Wall-mounted desks or fold-out tables
- Murphy beds with integrated shelving
These help you save space while adding flexibility to your layout.
- Can you live comfortably in a 400 sq. ft. studio apartment?
Yes—400 square feet is enough space for one person to live comfortably with the right design. The key is efficient layout, organized storage, and multifunctional furniture. With intentional decor and decluttering habits, small studios can feel cozy and surprisingly spacious.
- Is studio living cheaper than a one-bedroom apartment?
In most urban areas, yes. Studio apartments typically cost 20–40% less than one-bedroom units in the same neighborhood. They’re also cheaper to furnish, maintain, and heat/cool—making them a smart choice for budget-conscious renters.
- How do you decorate a studio apartment without making it feel cluttered?
Stick to a minimalist approach. Use 1–2 statement pieces per zone, choose coordinated colors and textures, and keep surfaces clean. Plants, layered textiles, and wall art add warmth without overcrowding. Hidden storage and vertical shelving help keep things tidy.
- What’s the best layout for a studio apartment?
There’s no one-size-fits-all layout, but common studio apartment layouts include:
- L-shaped studio: Kitchen on one wall, living and sleeping areas arranged along the other side
- Central kitchen layout: Kitchen in the middle, separating living and sleeping areas
- Loft or Murphy bed layout: Sleeping area is elevated or retractable to maximize daytime floor space
Ready to start? Today, pick one corner of your studio and apply a new trick: hang a mirror, add a plant, or slide in a shelf. Little by little, you’ll create a space that’s fully you.